I know, I know, it’s been a while since my last update, and a lot has happened since then as well, but this is part 2 only, not an update of where exactly we got to yet, so you won’t be inundated with a massive amount of information and pictures in one post.
As a quick recap, I’m building a loft bedroom for my son in the area above the stairwell in our house, because the second floor is blocked off and is a rental unit. I am doing it together with my kids instead of hiring someone to do it, to save money.
Ok, so after we knocked down the part of the cement railing that was sticking up higher than where the floor would be, we then needed to install the wood that would basically be holding up the entire loft. While I know how to do a lot, I also know my limitations, and I know what would be challenging for me to do. Not only that, I wanted to be able to rely on someone else instead of myself when it came to the safety of this loft bedroom, and so I decided that the frame of the room, the part that would be the base of everything and held up the entire room, I’d hire someone to do.
I spoke to a few people and in the end got a recommendation for a builder who was very experienced and professional, and he gave me a reasonable price for the work. I knew the actual work I wanted done wasn’t exactly so complicated and wouldn’t take so long to do, maybe an hour or two maximum, and he wanted $70 per hour, and $140 for a professional to make sure that the room was safe and secure seemed a very affordable sum. I would provide all the materials and he just did the actual work itself.
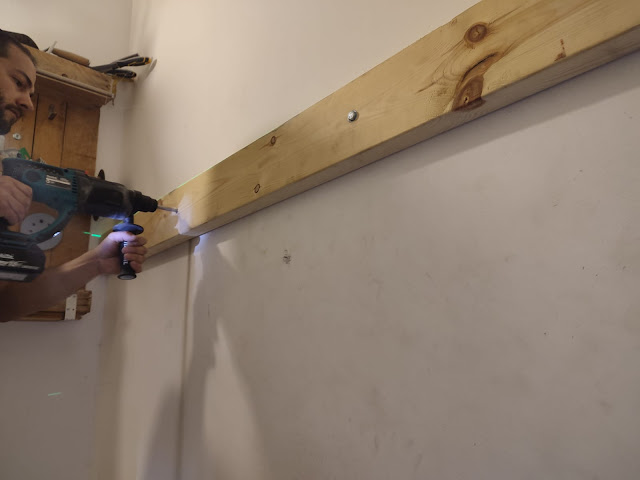
Essentially what I needed done was have the largest boards, 15 by 5 centimeters, drilled in along the length of the longer walls, because the wood holding the floorboards would be going across the shorter width of the room. I also needed wood drilled along part of the width in the area that would have the trap door on it, because I needed strong wood to hold up that trapdoor, which would not have its weight spread out across a large area like the rest would be. Additionally, I needed wood attached to the cement railing that we removed the top of, because again, in the area with the trap door, I needed to have the wood going width wise to have a place to attach to.
In addition to strength, the reason I wanted to hire someone to do this was because in order to get it level, and a floor needs to be level, it would be quite challenging with a regular level, and the price of a laser level, $450 minimum, would be much more than I’d be paying the man for the work, especially since a laser level for three dimensions isn’t something I need regularly, nor is it something I have much experience with so there’d be a learning curve even if I bought my own.
Then there’s the fact that this was the only part of the work that involved drilling into cement walls, and that intimidates me, because cement can crumble when you try to drill into it, not to mention the fact that cement is really hard to drill into and you need a special drill, and the hammer drill that I used to have for things like that is currently with my ex, and buying a new one would, again, cost more than the work I needed done.
The builder ended up taking 2 hours and not just the one hour I guesstimated originally to build it because I ordered the wood slightly too long and it needed to be cut to length first. I intentionally bought the wood a little long because you can always cut wood shorter but you can’t add on length.
For the job I provided special cement screws that expand once they are in the cement to really anchor them in there, and a few metal braces to attach the wood to the cement railing, since otherwise it would have involved drilling in across the 15 centimeters of wood and into the cement, which wasn’t a viable option.
It was really cool to watch the man work. I’d never seen a laser level before- it was standing on a tripod and sent out a bunch of lasers in all directions, so that the entire area had a laser line going around it. It made it quite easy to put up the wood level then, it just had to have its top exactly at the line the laser put out.
Once that was done, it was time for the parts we were going to do ourselves.
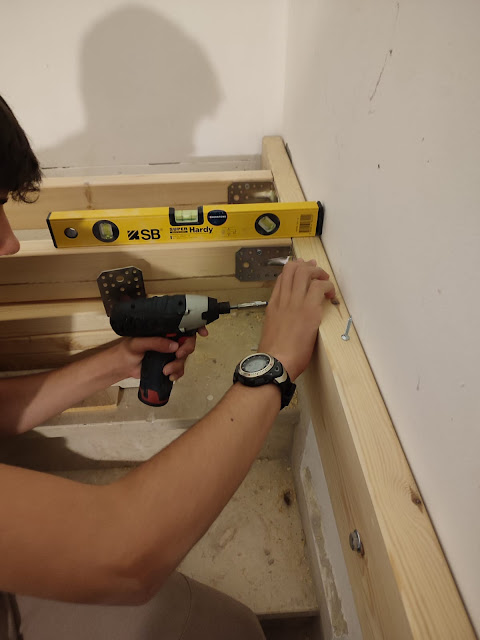
I found a video giving instructions on how to build a loft, and took this screenshot to the hardware store, to find parts to hold up the wooden beams going between the side beams. I picked out some heavy duty reinforced metal L brackets and planned on putting one on either side of the wooden beam. The proprieter laughed and said that I was being ridiculous, that if I’m trying to teach people how to save money by DIYing, this is literally just throwing money away because having that many wouldn’t make it any stronger. He told me to put just one on either end of the wood, not both sides. And so I took his advice.
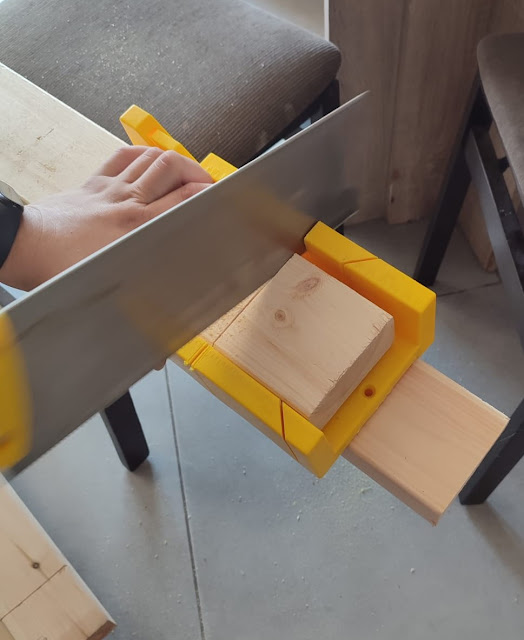
My son and I then measured the wooden beams and cut them shorter- when I designed the room originally I’d intended to place them on top of the side beams that I had professionally installed, so ordered them longer, but then I needed to make them shorter once I decided to put them level with the rest of the wood. We first cut them with a hand saw to start off the cut, using this plastic peice that I have no idea how it is called but my ex had purchased it, to make sure your cut is totally straight, but then did the rest with this multitool/oscillating tool that I purchased for this project.
I had ordered a decent but cheap impact drill to use for the project, but then my ex gave me one to use, and the place that I ordered the drill from contacted me to tell me they were out of stock. They asked if I wanted to order something else instead and I asked about an oscilatting/multitool, something my ex has and I’d used a few times, that I knew would be extremely handy in this project, as it allows for fine cutting in a way that a standard circle saw or even a jigsaw doesn’t. He said that he could give me an oscillating/multitool for that price, as long as it was with a cord and not wireless. I didn’t really care about that- I could just use an extension cord, and didn’t see a need to spend a lot more on one with a rechargeable battery (the battery is an extra cost). So in the end I got a Bosch brand multitool with a cord for $100 when it usually costs $170 and a cordless one one costs $220 to $300 and up, depending on brands. (For those comparing them to US prices… electronics cost a lot more locally because of high import tax on electronics.) So that is another expense for the project and so worthwhile- I’m officially obsessed with the multitool and it is my new favorite “toy”.
So back to the wood that we cut- we didn’t cut it exactly to size, intentionally. In order to make it stronger, we cut it a few milimeters longer than the distance from end to end, and then used a hammer to knock it into place, so it was wedged in nicely between the two outer boards. Once we did that, we then drilled it into place with the L brackets.
I did a lot with my eldest, Lee, but then when he was ouy of the house I tried doing it either myself or with my younger son, but Lee pointed out that I didn’t make them level and that would cause problems with the room, so I needed to redo it. Eventually I got it down pat- I needed to use a level on the wood, but I also needed to make sure that the wooden beams were level with the top of the wooden beams on the wall, which was a little more complicated, but we did it.
At this point, it really started feeling almost like a room. You could visualize more easily what it would look like. And of course we tested the weight by climbing on the boards, swinging from them, etc.
It also meant that from this point, in order to get up the stairs to work on the room we had to climb under or over wooden boards. Which brings me to the next steps…
But that’s for another post.
And in the meantime, here is a video walkthrough of the area.


.jpeg)


