Keeping your faucet working efficiently doesn’t require expensive repairs or complicated tools. One small part that often gets overlooked can make a big difference in water pressure, cleanliness, and even your water bill. Learning how to clean your faucet aerator is a simple task that can quickly improve how your kitchen and bathroom sinks perform.
One of the most powerful tools you can find in your kitchen is so small, you might not notice it. In fact, it’s smaller than a quarter and weighs just a few ounces, but it packs a serious punch when it comes to filtering your tap water and saving on the water bill. It’s called an aerator and it’s located at the very tip of your faucet.
The faucet aerator is engineered with a screen that not only provides more water pressure, but it traps impurities and dirt that can be found in your everyday tap water. What this means, however, is that from time to time, your faucet aerator requires cleaning.
According to Aerator.com, a company that sells aerators for faucets, removing and/or replacing your faucet aerator is an affordable and relatively simple maintenance task. The task is also said to significantly improve the efficiency, performance, and longevity of your kitchen faucet (also, your bathroom faucet).
That said, how exactly can you go about removing your faucet aerator for cleaning? A good place to begin is understanding precisely what a faucet aerator is.
A recent report by The Spruce states that, technically speaking, an aerator is a screw-on screen that’s attached to the tip of a faucet. It’s designed to separate or break up the solid stream of tap water while adding air. This increases water pressure while saving water usage by up to 30-percent or more, depending on the quality of the aerator.
Regardless of its quality, the typical aerator will eventually become clogged requiring cleaning or replacement.
The Tools You Need for Removing Your Clogged Aerator
These include channel-type pliers, hair dryer, masking tape or rag, small stiff brush (a toothbrush will suffice), penetrating oil, and lime-dissolving solution.
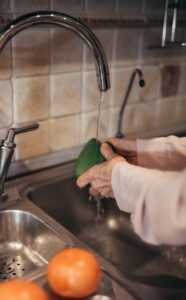
First Step: Removing the Aerator by Hand
You need to dry both your hands and the faucet tip before firmly grabbing hold of the aerator with your fingers. Unscrew the aerator counterclockwise. If your fingers alone are not strong enough, you will need to use pliers.
Second Step: Using Pliers to Remove the Aerator
Channel pliers are said to work best. Keep in mind, if the aerator is still in good, or like-new, condition and you intend to reuse it, you need to either wrap it with tape or a rag to protect the metal surface from scratching.
Grip the aerator with plier jaws. Make sure not to grip the faucet tip itself. Turn counterclockwise to unscrew the aerator and separate it from the faucet. If the aerator still won’t budge, then try moving the pliers a quarter-turn around the aerator and attempt unscrewing it from that new position. This helps you loosen a stubborn aerator up. Do not grip the aerator too tightly or you stand the chance of damaging it.
Third Step: Heat the Stubborn Aerator
If the pliers aren’t doing the job of loosening your faucet aerator, try applying some heat. You should only attempt this solution if your aerator contains no plastic parts. Heat will damage or even melt plastic. It will also damage rubber washers. If you aren’t quite sure if plastic or rubber components are contained in the aerator, apply heat moderately.
By applying “gentle heat” via the use of a hairdryer, you will expand the metal inside the aerator enough to loosen it with your pliers. If you don’t have access to a hair dryer, you can use the heat coming from a lit match or butane lighter to loosen your aerator.
Fourth Step: Apply Penetrating Oil to Loosen Your Stubborn Aerator
If heat doesn’t work, you might try utilizing penetrating oil such as WD-40 or a product like it. Simply spray the oil onto the aerator threads and allow it to sit for a few minutes. After that, wipe the excess oil from the aerator surface prior to attempting to unscrew it. The oil is said to provide enough slipperiness between the aerator threads to loosen it. Once again, attempt to unscrew it counterclockwise with your pliers.
Step Five: Time to Clean the Aerator
Once you have finally removed the aerator from the faucet, you need to separate the individual components while taking note of how to put them back together. Most aerators contain lots of small parts that need to be put back together in the right way for it to function properly.
You can use your toothbrush to remove any mineral deposits or grit from the screen and other parts of the aerator. It’s also possible you will need to soak all the parts overnight in a lime-dissolving solution should you encounter considerable mineral buildup.
In the end, if none of these steps workout for you, and you find it impossible to clean your aerator on your own, you will need to purchase a new one from a reputable dealer. A licensed professional can install it on your behalf.