|
| My homemade, all natural, and cheap soap! |
On Thanksgiving weekend, my husband had off, and I decided to take advantage of his being home to finally make homemade soap, which I had put off for a while. This is the third time I’ve made soap, but only the first time I made hot process soap, and I think I’ll be making hot process soap (in the crockpot) from now on.
The reason my husband needed to be home when I was making soap is because soap making involves lye, which is very caustic and can be dangerous if any spills or splashes, and for a few minutes, it lets off toxic fumes. Adults, with caution, can make homemade soap with lye easily, but kids around are a distraction, and can cause you to splash yourself or them, and they may breath in the toxic fumes, which is why I will only make soap when my kids are out of the house. I wanted to make soap now, enough to last a while, because once I have a baby, I won’t feel comfortable making soap until my kid is old enough to leave the house for an hour without me, something that doesn’t usually happen until my kids are over a year old. So now was my chance to make the soap.
Before I get into the instructions for soap making, I wanted to explain a little bit of the science behind it- why it’s perfectly safe to use homemade soap, despite it being made with a dangerous chemical such as caustic soda/lye, and how exactly soap making works. (In laymen’s terms. I’m not a scientist…)
To make soap, oils and/or fats are mixed with something very basic. In the olden days, they’d make homemade lye by mixing water with ashes, and then straining it, and using it to make soap. Today, you can skip that step by buying NaOH, also known as sodium hydroxide, caustic soda, or lye from the hardware store, and use that to make your soap. Some people may think that safety-wise it is preferable to use the homemade wood ash lye, but from a safety perspective, it isn’t any safer- both types of lye are really caustic- they are so basic that they will dissolve things. (The test to know that your wood ash lye is ready is if it dissolves a feather.)
However, you can’t make soap without the lye. The saponification process, the process of turning fats into soap, can only happen via mixing the oils with the very caustic, very basic materials- either sodium hydroxide or wood ash lye. But once these fats mix with the lye and are processed properly, they are completely neutralized and are not dangerous. If you want to “not have dangerous chemicals in your house” and instead use things like store bought castille soap or Dr Bronners- I have a secret for you- those are also made with lye. All soap is lye based- the question is- are you doing the handling, or is someone else?
In terms of danger- the first few times you’re soap making, you’ll probably be more worried, wondering “what if” things don’t go as you hoped, and you did something dangerous. For safety’s sake- cover your eyes, either with glasses or goggles while making soap, wear gloves, and keep a bottle of vinegar on hand. Vinegar neutralizes the basicness of the lye, so if any splashes on you, just douse in vinegar and you should be totally fine. You’ll know if any lye splashes on you if you feel any burning sensation on your skin.
Now that I hopefully reassured you as to the safety of it- how do you make soap?
Well, there are two main ways of soap making. One hot process and one cold process. The first two times I made my soap, I used the cold process method that I learned about on this great homesteading blog called Down To Earth. Then I read about making soap in a crock pot, using what is called the hot process method, and used it last time, and found it vastly superior, and plan on doing it that way from now on. In summary, both methods are similar in that you first heat the oils, then add the lye to the water, let the lye water off gas and cool off somewhat, then mix it well with the oil until you reach the stage called trace, and then in the cold process method you put the mixture in molds, and let it “cure” for a while- before that, the lye and the oils haven’t finished reacting, so it isn’t safe to use until it finishes curing. In hot process soap, after reaching saponification, you heat the soap on a low heat for about half an hour, after which the soap is safe to use. I’ve heard that cold process soap is supposedly easier on the skin, but I don’t believe it- since I’ve made both, and the end result of both seemed exactly the same. And hot process soap is better for impatient people like myself- you can make your soap and have it ready to use, minimum, within 4 hours- but it is best to let it sit longer, because the longer the bar of soap dries, the longer it’ll last.
So what’s the recipe for homemade soap? That, my friends, is pretty much up to you. You can use whatever oils you have on hand, some water, and some lye. In deciding what types of oils to use in your soap, you can read about the different properties that different oils give to the final product. Some oils make good lather, some oils make the soap work even in very hard or salty water, some make a harder bar and some make softer bars. I suggest you read up about the different oils you were considering using, and then make a mix, so your soap isn’t too much of one oil or too much of another.
Just a note, in case you were debating using olive oil in your soap. You can use any type of olive oil, from the extra expensive, extra virgin olive oil, to the much cheaper, pomace olive oil meant for use for candle lighting– all are fine and work equally well, and in fact, the cheaper oil reaches trace faster, and retains more of the olive oil properties in it even after making it into soap, so some say the cheaper olive oil is actually best for soap making. That’s what I used- it’s at least 1/3 of the price of other olive oil.
Once you decide what oils you will be using, you use what is called a “lye calculator”, which is a site like this where you plug in the weights of the different oils you will be using, and it tells you how much lye and how much water will be needed. So you can make up your own recipe. If you’re curious- this is the exact recipe I used- I used it because I had coconut oil and palm oil in bulk, and bought olive oil and sunflower oil cheaply, but there’s no need to use this recipe- just use what mix of oils you can find cheapest, etc…
If you tend to have dryer skin, use the higher percentage fat listed in the results- this uses less lye, leaves more fat in the end result, which is more moisturizing and less drying for the skin. This is called superfatting your soap, and will yield a softer bar as well.
Soap making requires a precise, digital scale, so if you don’t have one, you’ll need to buy or borrow one. For soap making, things are measured by weight, not volume.
Equipment needed:
Crockpot or metal pot (but NOT aluminum!!!)
Thick plastic container
Scale
Mixing spoons, ideally wooden or thick plastic
Blender stick or electric mixer (not 100% necessary, but makes the process go much, much, much faster)
Gloves
Goggles
Molds (I use silicon ones, but thick plastic is also ok)
Oil
Water or other liquids (you can also use milk, whether cow milk, goat milk, almond milk- and some people even use breastmilk, which apparently is extra good for sensitive skin)
Lye
Oils for fragrance, additives like lavender blossoms or oatmeal, or additives for color (optional)
Ingredients/Recipe I used:
1075 mililiters/grams water (the weight and volume of liquid water is exactly the same)
Before I write the whole process- people who heard what type of oils I used were surprised that I felt it was financially worthwhile- isn’t it just cheaper to buy soap from the store instead of making it at home, especially since I used more expensive oils? So to allay your concerns- firstly, this soap isn’t equivalent to store bought bar soap- that stuff is generally laden with chemicals, fragrances, etc… and is very harsh on your skin, and many people are allergic to it, and if people have eczema or psoriasis, etc… it can make it worse. This is the equivalent of all natural, health food store soaps, which typically sell for 2 or 3 dollars per bar, if not more. It 1000% is cheaper than the equivalent health food store soaps, and for that reason alone, it is worth making. But if you, quite frankly, don’t care about the chemicals and just care about the cost- is it still worth it?
Well, with the prices I paid for my oils and lye (I was being very generous and rounded up the amounts- I probably spent less than this), I spent on $11.75 on my soap making materials. It made 9.25 lbs of soap. I got 42 100 gram bars of soap, which cost 27 cents per bar. Locally, regular bars of store bought soap cost about 90 cents per bar, so the homemade soap is cheaper for sure, not to mention being of much better quality.
How to Make Soap:
1. First clear out your house/work area of any kids, animals, distractions, etc… Soap making is perfectly safe so long as you take precautions, among them not having any distractions. Put on goggles and gloves.
2. Then measure out all your ingredients, making sure you have everything you need.
3. Mix up and heat up your oils until they are around 100 degrees. You don’t need a thermometer for this- just feel that its slightly too hot to comfortably touch. Some people do this in a crock pot- I was impatient and just did this on the stove top, since the crock pot takes a lot longer to heat things up, but it’s your choice.

4. Measure your lye carefully, making sure not to get it wet. (I used disposable cups and a disposable spoon for this reason, so I wouldn’t have to wash it after.)

Once the lye touches water, it will start heating up tremendously and being extra caustic and letting off toxic fumes, so keep it dry until you’re ready to work with it.
5. Measure your water and put it into a large, ideally plastic container. Don’t use thin plastic as I did in the pictures this past time, since plastic isn’t so heat resistant and will bulge and melt a little bit, and might even completely melt if you’re unlucky, and that’s very dangerous. Previous times I used thick plastic pitchers, which worked much better.

6. Add the lye to the water— ALWAYS THIS ORDER- NEVER PUT WATER ONTO LYE OR YOU WILL HAVE A TOXIC, DANGEROUS, CORROSIVE VOLCANIC ERUPTION. So now that I made that safety point very clear, add the lye to the water and mix it well with a wooden or thick plastic mixer. I used a wooden stick. Be sure not to breath in the fumes while you’re mixing- I just gave a quick mix, then placed it outside my kitchen window, on the sill, and closed the window, so it could off gas outside without my needing to breath in any dangerous fumes. It will also get very, very, very hot from the chemical reaction of the lye mixing with the water, and the water will turn cloudy.

Watch it occasionally- after 5 to 10 minutes, the water will start to clear, it no longer will be releasing fumes, and it will cool down considerably, but still be roughly 100 degrees, about the same temperature as the oils.

While this was happening, I put the oil in the crockpot and put the crockpot on low. If you already used the crockpot to heat up the oil, turn it off. I just turned it on at this point because it takes a while to heat up, and knew it would only be warm enough once I finished the saponification process.
7. Carefully pour the lye water into the oil, and then give it a few mixes with your spoon, being careful not to splash. You’ll see the color of the oil starting to change, becoming more opaque.

Now you can use your blender stick or electric mixer, and keep mixing/blending until the whole thing becomes thick, white, and the consistency of vanilla pudding.
 |
| This is almost there, but not quite. Still some oil around the edges that didn’t appear completely mixed. |
When it becomes pudding textured, so that when you draw a line in it, the line remains after, this is called reaching trace- when the oil and lye have completely mixed and saponified.

You can keep on mixing further- some people like to stop mixing it exactly at trace, some people like mixing it a bit more- I haven’t read anything conclusive about why it’s better or worse to stop at different points- so I like to continue mixing a little beyond trace, just to be sure its “really at trace”… With the oils I used and the blender stick, it took me less than 5 minutes of blending to reach trace. Different oils take more or less time to trace, and if you mix by hand the entire time- which is possible- it will take much longer to trace- 20 minutes to 30 minutes, possibly- so I don’t recommend it, because your arms will get tired, but it IS possible.
8. If you’re making cold process soap, pour it into molds now and cover them to let them dry slowly for 12 hours or more before removing from the mold. If making hot process, skip to step 9.
9. Heat the soap on low in the crockpot, mixing occasionally, and keeping a very close eye on it. I wasn’t watching my soap well enough, wasn’t mixing often enough, and it rose up and out of the crockpot, onto the counter, etc… making quite a mess to clean up.

All that stuff was non corrosive by the time it overflowed from the crockpot, so it didn’t hurt the counters or my hands when picking it up, it just was an annoyance. So just keep an eye on the crockpot, and mix it often, especially if you see it starting to rise up.
Heat the soap until it gets the consistency of waxy mashed potatoes- this took about 20 minutes for me.

If you want to add additives, now is the time. You can add dry colorful powders like spices (turmeric), cocoa powder, spirulina, or anything else to make it colorful. You’d also add oatmeal or flowers now, as well as any fragrances like essential oil. For my batch, I kept most plain, but added a little spirulina and mint essential oil to part of the batch, and then added a little cocoa to some of that, which I used to make mint chocolate soap.

10. Pour or spoon the soap into molds. These can be pretty shaped molds, like some flower shaped molds I have, or silicon muffin tins, or just large square or rectangular molds, which then can be cut into smaller bars once hardened somewhat.

If doing that, let the soap cool and harden for about 3 hours, then cut the soap carefully into bars with a sharp knife.


11. Set the soap aside for a day or two at least, possibly a week or more, to dry. The longer soap dries, the longer the bar will last. But it CAN be used right away, as soon as you take it out of the crockpot even.
|
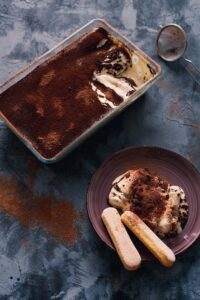
| My final amount of soap that this recipe made. |
This soap can be used to make liquid soap, by grating it and mixing it with a little boiling water. This won’t have the consistency of typical liquid soap, but works well for washing dishes, soaking veggies and fruit, etc… and can also be used to wash your hair and body in the shower. You can also use this in homemade laundry detergent….
It really isn’t complicated to make soap. It sounds “scary” at first, but it’s really quite easy, something that a novice can easily do.
How much do you pay for your bars of soap locally? How much for regular “grocery store” soap, and how much for “health food store soap”? Do you use specialty soaps because of skin issues? Have you ever made homemade soap before? Do you think after reading this, you’ll get enough confidence to make your own homemade soap? Does the process I shared sound difficult or manageable?
Linking up to the Homestead Barn Hop