My kids recently switched bedrooms. Or more like they started switching rooms a month ago and my house still hasn’t recovered, and my living room still is filled with things that need to make it into their new rooms. Before now, the girls shared the largest bedroom, and the boys each had their own bedroom. The girls really needed to switch, to finally have their own space after their whole lives sharing a room. The boys, on the other hand, while not in love with the idea, had their own rooms for a while already, and my older son is moving out of the house and going to the army in 2 months, only coming home every other weekend, so it makes no sense for his room to be sitting empty while my daughters share a room.
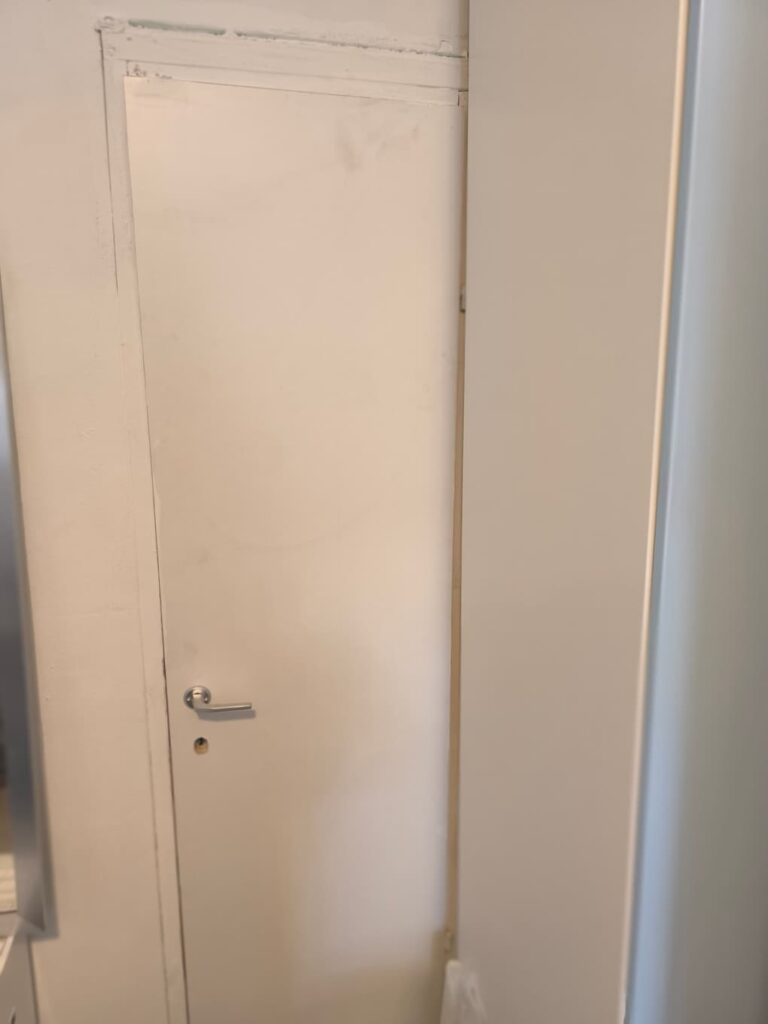
The thing is, my boys are sensitive to sound and light, and the largest bedroom had the entrance to our pantry/storage space directly from their room, and that space also had an opening to the rest of the house, blocked by the washing machine and dryer, but still allowing light and sound through. This was just an opening in the wall with no door, allowing both sound and light through, not to mention visual clutter from the stuff in the pantry/storage area.
My boys said that they were willing to switch rooms only after a door was installed to the pantry/storage area. (They also requested that the things from the pantry be mostly removed and only what needs to be accessed rarely be kept under there, so we don’t constantly need to enter their room.) I was willing to do that, but I didn’t want to spend a lot of money. It seemed like something I should be able to do myself, since I’m a capable person and good with my hands.
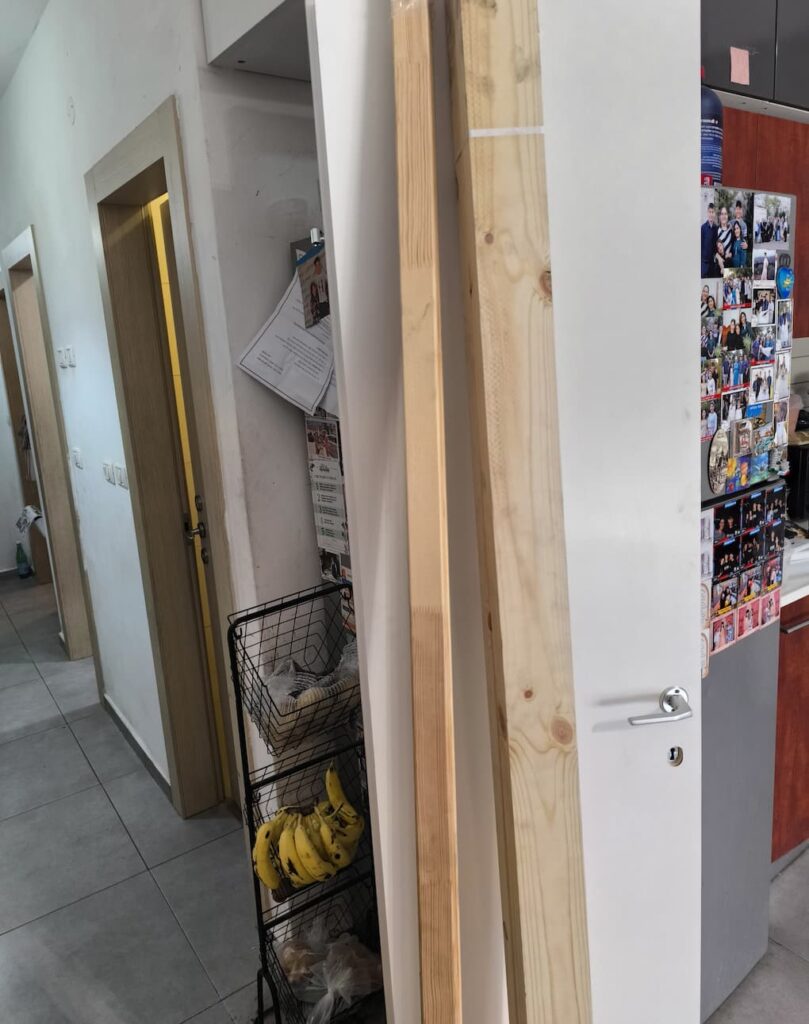
I did some price comparison online and found a store about an hour and a half drive away from my house that sold doors for much cheaper than any other place I saw online, and they had them in various sizes. This space had an opening that was a little more than 60 cm wide, which was the smallest door the company sold. I wasn’t sure the door would fit in my car, since my car is a small 5-seater, so I brought equipment with me to tie the door to the top of my car just in case, but fortunately it fit. The door came with a door frame, but the door frame wasn’t a solid piece like I was hoping, that I could just slide into the hole in the wall, but three pieces of wood that I needed to attach separately. It also came with some small thin pieces of wood to go over the door frame to make the frame more aesthetic. I also got some polyurethane expanding foam meant to fill in the little gaps left between the door frame and the wall gap.
I brought the door home, and then came the problems.
Well, first off I needed to take the tile off the bottom of the wall opening so I could fit the door frame directly onto the cement of the wall.
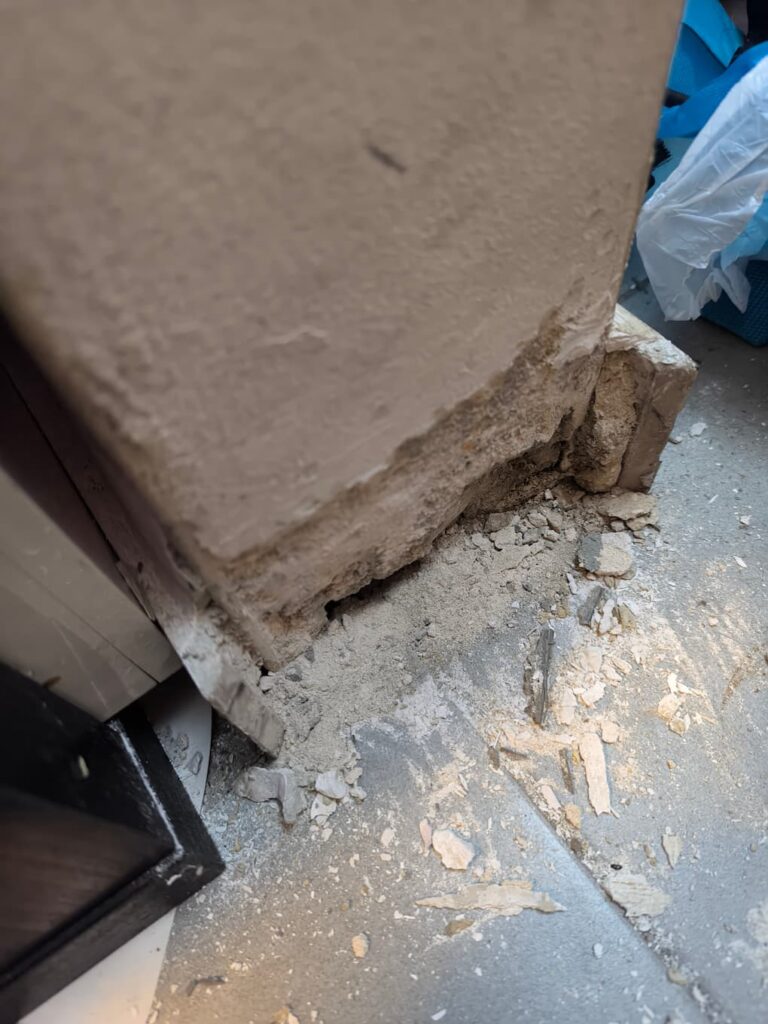
This was simple enough and just took a hammer and a wedge (but before I found the wedge for the second one I used a kitchen knife for the first one).
With the tiles off, I put in the door and the door frame, and saw that there was too much room, a good 4 or so centimeters between the bottom of the door frame and the opening at the bottom. Then there was a good 7 centimeters or so at the top. Yes, they didn’t make the gap even. And in addition to that, there was a good 6 or so centimeters above the top of the door frame and the lintel. This is far too much space for the polyurethane foam to fill, so I knew I needed to pay a visit to the local lumberyard.
When I went to the lumberyard and told them my issue, they told me that the 5-centimeter wooden beams were actually 3.5 centimeters thick and should be perfect for my job, and I had the idea to fill in the rest of the small gap between that wood and the wood frame with the pretty wood that came with the door frame to make it more aesthetic. They cut the wood to size (or rather, the size I told them I needed, which ended up being incorrect, so I had to use the extra wood that came with it to fill in the rest of the area) and I took the wood home.
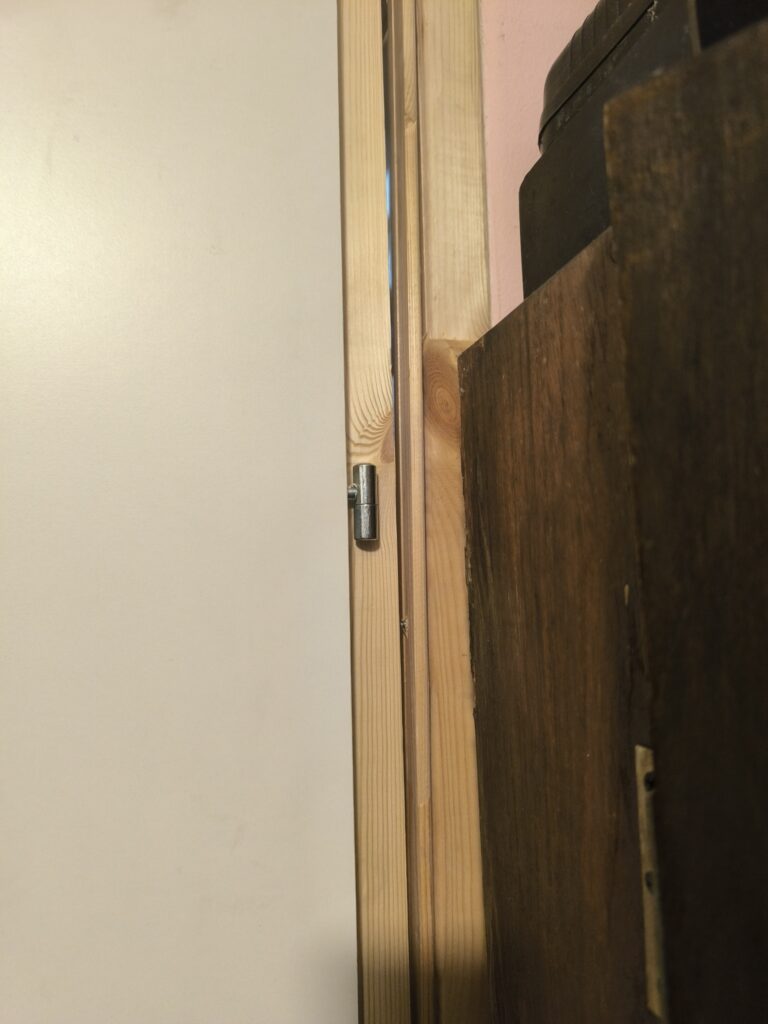
Once the wood was in place, I first drilled one side of the door frame to the wall opening using a hammer drill to make the holes since it was going through cement, hammering in cement anchoring screws, and then screwing those in with my impact drill. I then did that with the wood from the lumberyard on the opposite side, and then positioned the door frame so I could see exactly where it needed to go, and then filled in the gaps with the thin bits of wood, and then drilled the frame through those into the wood that was attached to the opening.
I then deliberated about how to attach the top of the door frame, because even with the wood I bought and the thin piece of wood, there was too much space (but not enough for a second piece of wood) and I wanted the door frame to be all connected, so I ended up very carefully drilling the top of the door frame to the sides, without blocking where the door would close.
Voila.
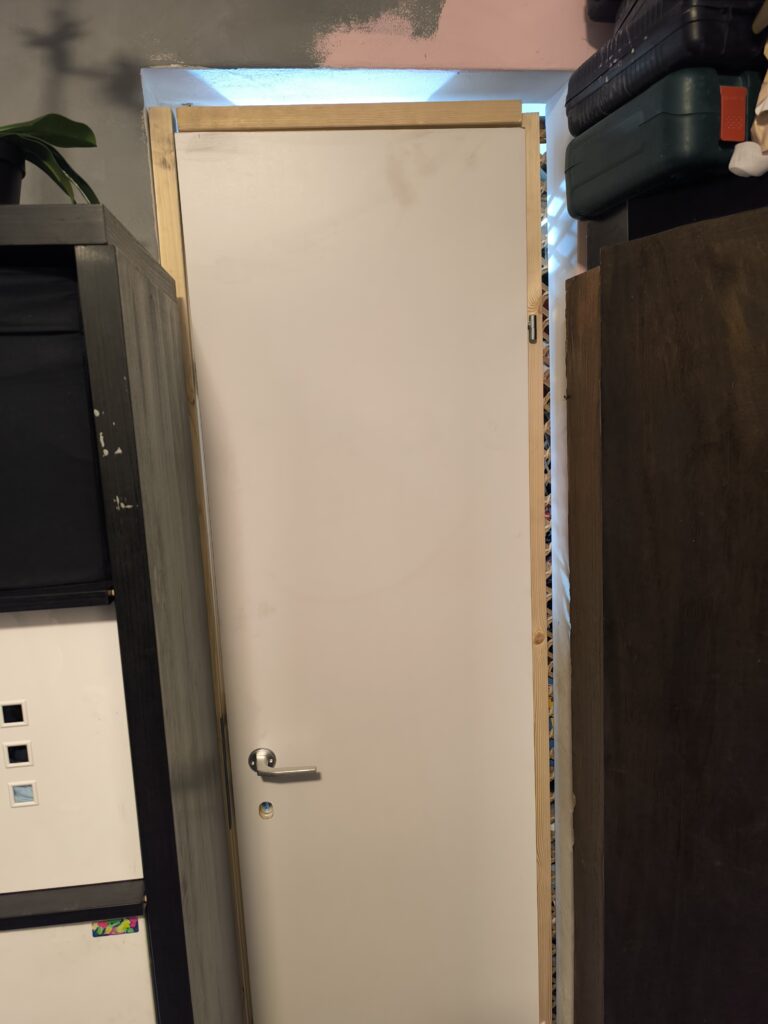
The door frame was installed.
It now was time to stick on the door. I put the door on the hinges and saw that it didn’t close properly, so I took it off and adjusted the sides of the door (and took out a second thin piece of wood I’d stuck in at the top, hoping to close the gap) and then the door closed properly and latched.
Yay! All done.
(Once my son got home he pointed out that I’d installed the door frame slightly crooked and the door leaned forward a bit at the top, but after all that work I wasn’t redoing it for something so minor.)
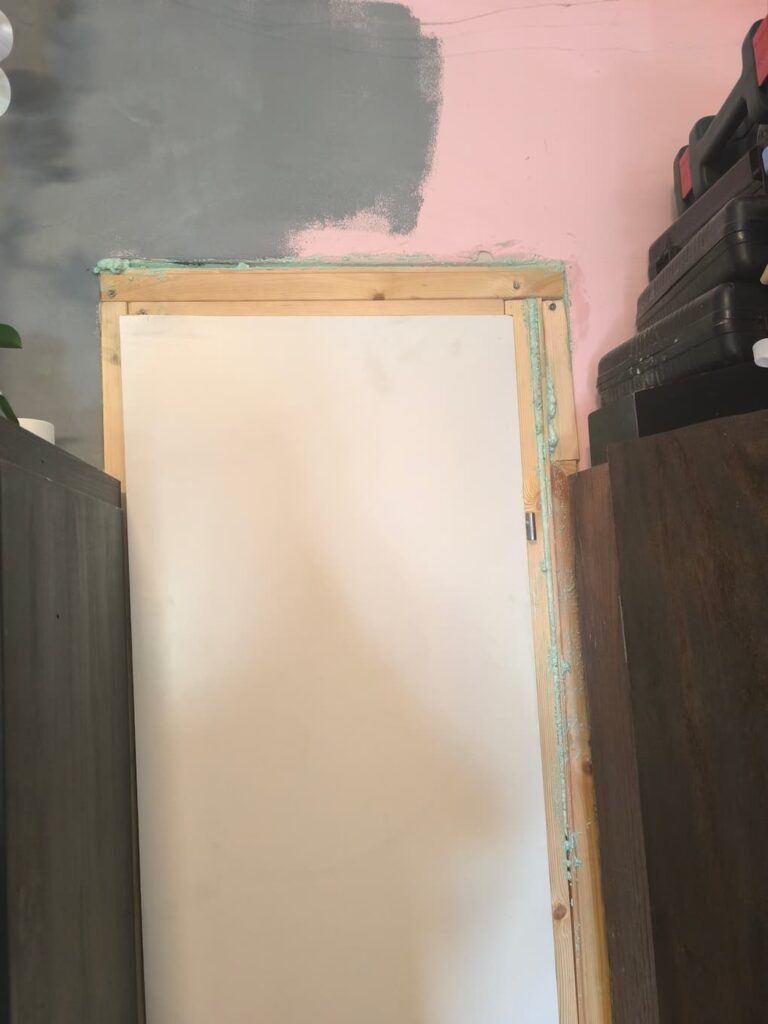
Once that was done, I filled in whatever gaps I could with the bright green polyurethane foam, which expands to fill the space, and then hardens. The problem is that there is a thin straw that the foam comes out of, and some of the gaps were too small for the straw to go into, so there are still a few small cracks left. I need to figure out a solution for them, but they are minor so have been left for now.
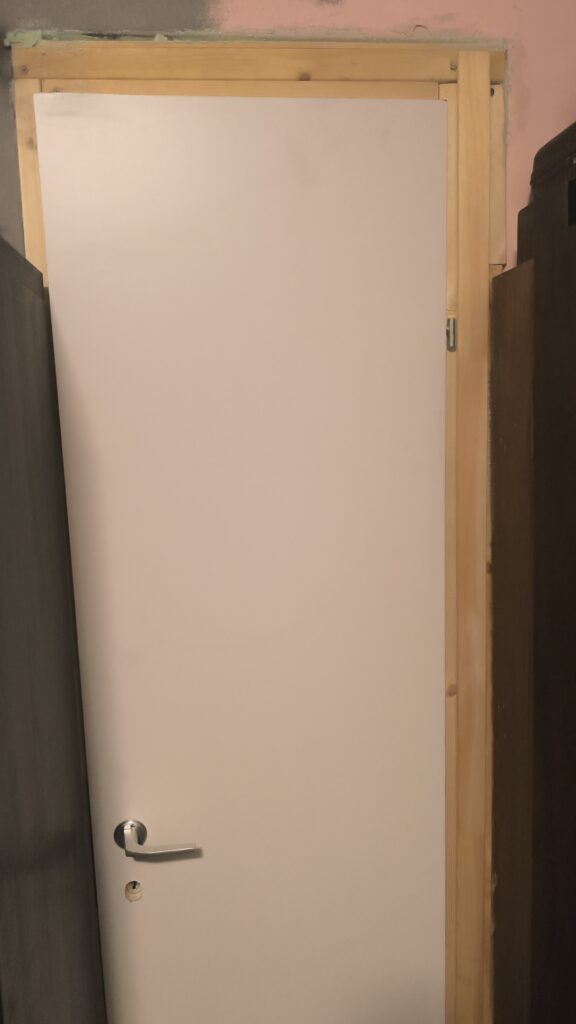
I took the last bit of pretty wood left and stuck it onto the polyurethane foam at the side of the doorway to make sure the largest foam areas were covered, and then it was complete.
The last bit that was done was the night before the kids switched rooms, when we painted the room white. That was when we painted the door frame so it blends into the rest of the room.
I honestly have no idea how much money I saved by installing my own door, but I know it must not have been insignificant, especially since it wasn’t a simple job, what with the space not being the right size for the door. (It wasn’t that I got it wrong, standard sizes for doors are 60 cm, 70 cm, 80 cm, etc., and this was 64 or so.) I’m very proud of the work I did, and each time I enter the room and see the door, and even more so each time I open the door, I get proud of myself.
Of course, I subluxed my pelvis doing this and was in pain the rest of the week until I had physical therapy, but it still felt worth it.
Have you ever installed a door yourself? Is it something you’d consider doing?